Over the weekend I was able to view the 14th Annual Master Sand Sculpting Competition in Hampton Beach, NH. The crowd gathered behind the viewing area to examine the painstakingly detailed sculptures. I consider myself an artist of many mediums but building even the simplest sand castle usually ends in a distorted pile of seaweed and shells or anything I can find to cover up the areas that collapsed like a failed soufflé. The competitor in me wanted to find out exactly how these artists are able to make such strong, detailed castles. See the tips I found (below the photo). via: sandscapes and Martha Stewart. 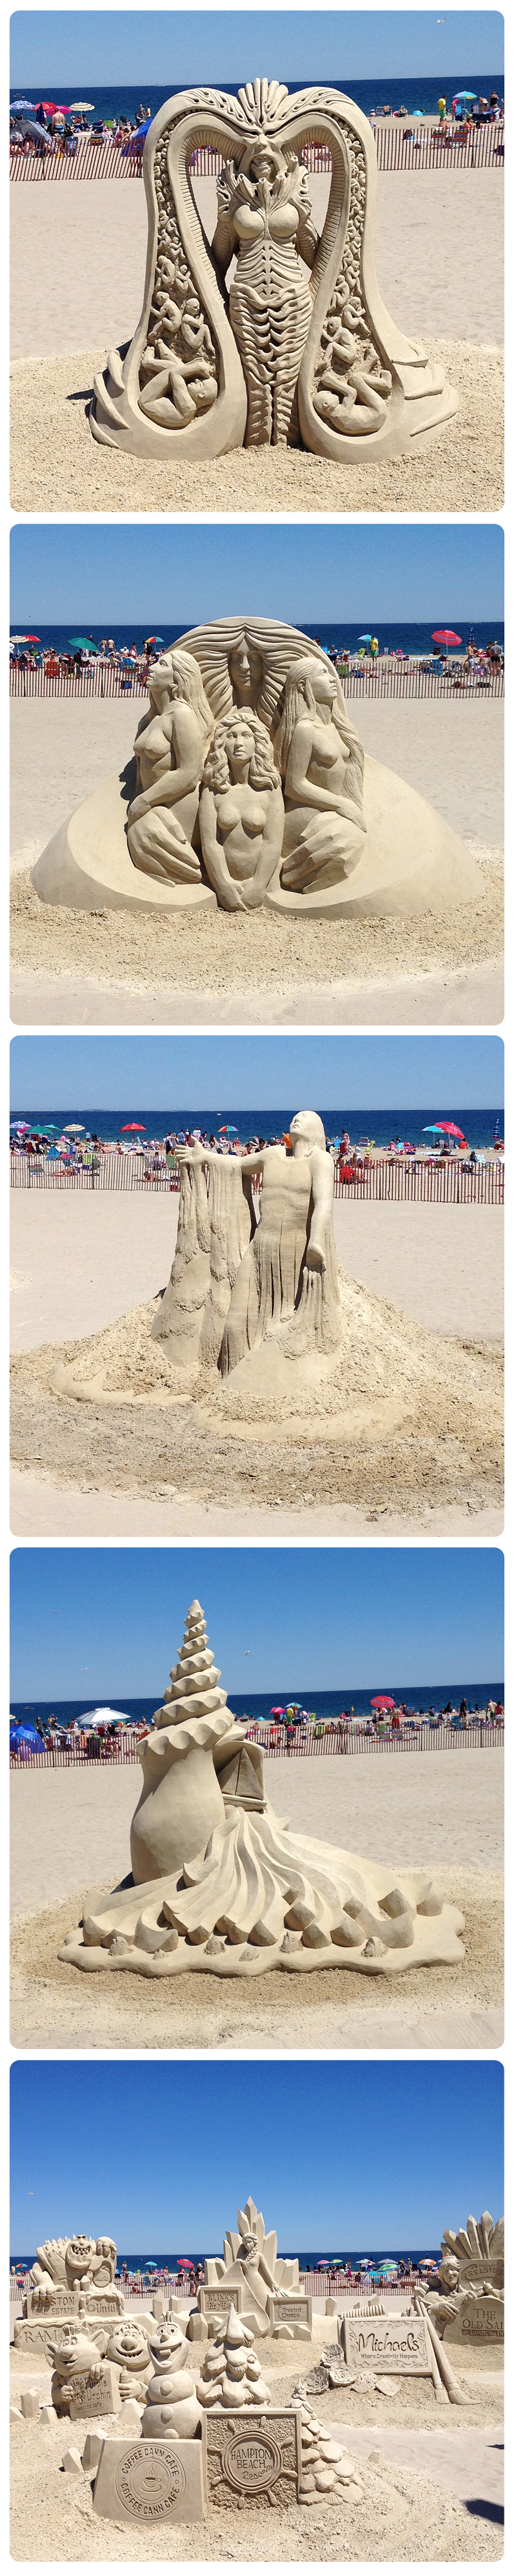 1- The right type of sand and spot.
If the sand you are using isn’t packing easily, then there is no hope for your castle. A quick sand test is to pack a golf ball size wad of wet sand into a ball. Flatten your palm with the ball of sand in the middle and carefully move your hand in a circular motion allowing the ball to roll. If the sand hangs together, you have found your spot. The general rule is, finer sands and angular grained sands are best. Pretty simple.
2- The right tools.
-1 shovel for each person helping
-1 small bucket for shaping towers
-Two-by-two for tapping out air
-Paint stirrer for sketching and smoothing
-Measuring spoons and melon-baller for making windows
-Offset spatula and plastic knife for carving
-Large Buckets for hauling water and building and one with the bottom cut off
-Spray Bottle
-Drinking Straws
-Other shaped containers: for turrets and towers, use milk or egg cartons, funnels, or yogurt tubs
3-Planning, digging, pouring, pounding.
-Using your paint stirrer, draw the foundation of your sand castle. (Make sure your location isn’t too close to where the tide comes in!)
–Fill your foundation area with sand and create a mound pile. The pile should be a little bit taller than the first floor of the castle.
-With the back of a shovel, pack the sides of the mound to form walls. Make them higher than the center of the mound, creating a “bowl” to hold water. Keep packing until you get the height you want.
–Add bucketfuls of water to the center of the mound to form a pond, and pour evenly around the inside so as not to create weak spots.
4- Building.
-Place a large bucket with bottom cut off on the mound. Fill three-quarters up with sand. Pour in water, climb in, and stomp. Tap sides with a two-by-two to remove air. Repeat until bucket is full, then lift it off. Add more towers with the smaller buckets- pack firmly, top the containers with more sand and water, and then turn over in place.
5- Carving.
-Once you have the basic castle shape, use the remaining tools to make the sides straight and add windows, doors, and other details. Since the sand has been tightly packed with water, it will maintain its shape.
-Make a wall shape with a downward motion, slicing into the side with the offset spatula and removing sand as you go. To make walls level and fine-tune the angles, run the spatula or paint stirrer down all four sides. The smoother the walls are, the more real your castle will look.
-You can make ledges by sliding the offset spatula over the roof to make it level. Holding the spatula at an angle, cut into the sand with a sawing motion. When you’ve worked your way in to the depth of the spatula, cut away the excess sand by running the spatula straight down.
-Draw windows with the plastic knife. Angle offset spatula or knife into the window; carve sand away. Use the rounded edge of knife to shape curves of windows. Make lookout windows with melon baller or measuring spoons. Blow excess window sand away with drinking straw.
6- Try to take it lightly.
If you’re like me, you want it to be perfect the first time. Keep practicing- stay detached from it, consider it trial and error, and have fun with the process!
 The Bubbler is a place we put all of the project bragging, inspirational, technical and sometimes witty moments which bubble to the surface while working in the design world and playing around our fine coastal city, Portland, Maine.